

How to Fix Roof Leak Under Solar Panels
Roof leaks can be a significant concern for homeowners, especially those with solar panels installed. A leak under solar panels not only compromises the integrity of your roof but can also damage the solar system itself, leading to costly repairs and decreased energy efficiency. Understanding how to identify and fix these leaks is crucial for maintaining your home’s value and ensuring the longevity of your solar investment.
This guide is relevant for homeowners with solar panels, roofing contractors, and anyone considering solar energy installation. By addressing leaks promptly, you can prevent further damage, save on repair costs, and maintain the efficiency of your solar energy system.
Why Roof Leaks Occur Under Solar Panels
Understanding the root causes of roof leaks under solar panels is essential for effective repairs. Here are some common reasons:
- Poor Installation: If solar panels are not installed correctly, they can create gaps that allow water to seep through.
- Damaged Roof Membrane: Existing damage to the roof can be exacerbated by the weight and installation of solar panels.
- Improper Sealing: Inadequate sealing around mounting brackets can lead to leaks.
- Weathering: Over time, roofing materials can degrade, leading to vulnerabilities.
Identifying the Leak
Before you can fix a leak, you need to locate it. Here’s how:
- Visual Inspection: Look for signs of water damage, such as stains on the ceiling or walls directly below the solar panels.
- Check for Moisture: Use a moisture meter to detect damp areas on the roof.
- Inspect Seals and Mounts: Examine the mounting brackets and seals for any signs of wear or gaps.
- Water Test: If safe, use a hose to simulate rain and observe where water may be entering.
Preparing for Repairs
Once you’ve identified the leak, it’s time to prepare for repairs. Here’s what you need:
- Safety Gear: Wear appropriate safety gear, including gloves, goggles, and a hard hat.
- Tools and Materials: Gather necessary tools such as a screwdriver, sealant, roofing cement, and a ladder.
- Access to the Roof: Ensure you have safe access to the roof, preferably with a sturdy ladder and a harness if necessary.
Fixing the Leak
Now that you’re prepared, follow these steps to fix the leak:
Step 1: Remove the Solar Panels
Carefully remove the solar panels to access the roof beneath. This may require assistance, as panels can be heavy.
Step 2: Inspect the Roof
Once the panels are removed, conduct a thorough inspection of the roof surface and the areas surrounding the mounting brackets.
Step 3: Repair Any Damage
If you find any damaged roofing material, replace it. Use roofing cement to patch small holes or cracks.
Step 4: Reseal Mounting Brackets
Apply a high-quality sealant around the mounting brackets to prevent future leaks. Ensure that the sealant is compatible with your roofing material.
Step 5: Reinstall Solar Panels
Once repairs are complete and the sealant has cured, carefully reinstall the solar panels. Ensure they are securely mounted and properly sealed.
Preventing Future Leaks
To avoid future leaks, consider the following preventive measures:
- Regular Inspections: Schedule annual roof inspections to catch potential issues early.
- Professional Installation: Always hire qualified professionals for solar panel installation.
- Maintain Roof Condition: Keep your roof in good condition by addressing wear and tear promptly.
When to Call a Professional
While many homeowners can handle minor repairs, some situations require professional assistance. Consider calling a roofing contractor if:
- The leak is extensive or difficult to locate.
- You are uncomfortable working on the roof.
- There is significant damage to the roofing material.
- You need to remove and reinstall solar panels.
By following these steps and taking preventive measures, you can effectively manage and fix roof leaks under solar panels, ensuring the longevity of both your roof and your solar energy system.
Understanding How to Fix Roof Leaks Under Solar Panels
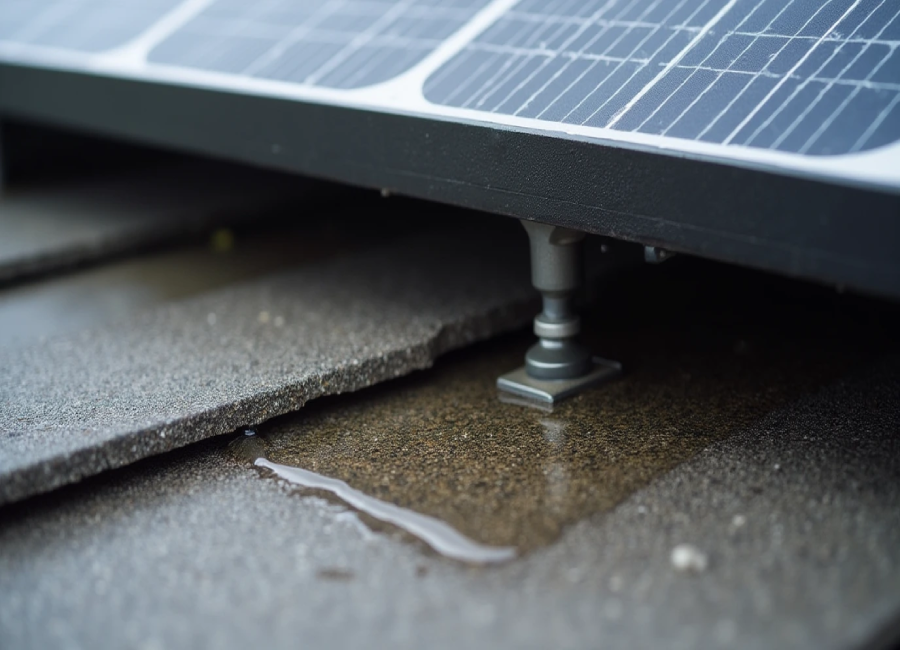
Fixing a roof leak under solar panels may seem daunting, especially for beginners. However, breaking down the process into manageable steps can make it easier to understand and execute. This guide will provide a clear, beginner-friendly explanation of how to identify and fix roof leaks under solar panels, along with common challenges and mistakes to avoid.
Step-by-Step Process for Fixing Roof Leaks
Here’s a straightforward step-by-step process to help you fix a roof leak under solar panels:
Step 1: Identify the Source of the Leak
Before you can fix a leak, you need to determine where it’s coming from. Follow these steps:
- Look for Water Damage: Check the ceiling and walls below the solar panels for water stains or discoloration.
- Inspect the Roof: Go onto the roof (safely) and visually inspect the area around the solar panel mounts for signs of damage or gaps.
- Conduct a Water Test: If safe, use a hose to simulate rain on the roof and observe where water may be entering.
Step 2: Gather Necessary Tools and Materials
Before starting repairs, gather the following tools and materials:
| Tools | Materials |
|---|---|
| Ladder | Roofing cement |
| Screwdriver | Sealant |
| Utility knife | Replacement roofing material (if needed) |
| Moisture meter | Protective gear (gloves, goggles) |
Step 3: Remove the Solar Panels
To access the roof for repairs, you will need to remove the solar panels:
- Turn Off the Solar System: Ensure the solar system is powered down to avoid electrical hazards.
- Carefully Detach Panels: Use a screwdriver to remove the mounting brackets and carefully lift the panels off the roof.
Step 4: Inspect and Repair the Roof
With the panels removed, inspect the roof for damage:
- Check for Cracks or Holes: Look for any visible damage to the roofing material.
- Patch Small Holes: Use roofing cement to fill in small cracks or holes.
- Replace Damaged Sections: If there are larger areas of damage, you may need to replace sections of roofing material.
Step 5: Reseal Mounting Brackets
To prevent future leaks, reseal the areas around the mounting brackets:
- Apply Sealant: Use a high-quality sealant around each mounting bracket to create a waterproof barrier.
- Allow to Cure: Follow the manufacturer’s instructions for curing time before proceeding.
Step 6: Reinstall Solar Panels
Once repairs are complete, it’s time to reinstall the solar panels:
- Carefully Place Panels: Align the panels with the mounting brackets and secure them in place.
- Reconnect Electrical Components: Ensure all electrical connections are secure and properly insulated.
Common Challenges and Risks
While fixing a roof leak under solar panels is achievable, there are common challenges and risks to be aware of:
- Working at Heights: Roof work can be dangerous. Always use a sturdy ladder and consider using a harness for safety.
- Electrical Hazards: Ensure the solar system is powered down before starting any work to avoid electrical shock.
- Weather Conditions: Avoid working on the roof during inclement weather, as wet surfaces can be slippery and hazardous.
Common Mistakes to Avoid
Here are some common mistakes that beginners often make when fixing roof leaks under solar panels:
- Neglecting Safety Precautions: Always prioritize safety by wearing protective gear and ensuring stable footing.
- Rushing Repairs: Take your time to ensure that all repairs are done correctly; hasty work can lead to future leaks.
- Ignoring Existing Damage: If there are signs of extensive damage, consider consulting a professional rather than attempting a DIY fix.
Understanding Key Terms
To better understand the process, here are some key terms related to roof leaks and solar panels:
| Term | Definition |
|---|---|
| Sealant | A material used to fill gaps and create a waterproof barrier. |
| Roofing Cement | A thick, tar-like substance used for patching and sealing roofing materials. |
| Mounting Brackets | Hardware used to secure solar panels to the roof. |
| Moisture Meter | A tool used to detect moisture levels in materials. |
By following these steps and being aware of common challenges, you can effectively fix roof leaks under solar panels and maintain the integrity of your home and solar energy system.
Common Downsides, Myths, and Misconceptions About Fixing Roof Leaks Under Solar Panels
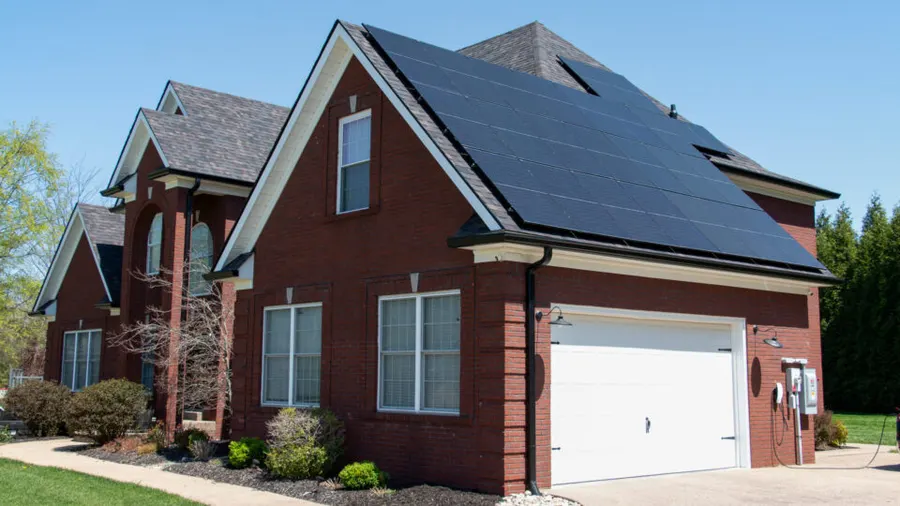
When it comes to fixing roof leaks under solar panels, several downsides, myths, and misconceptions can lead to confusion and potentially costly mistakes. Addressing these issues is essential for homeowners to make informed decisions about their solar energy systems and roof maintenance.
Common Downsides
While solar panels offer numerous benefits, there are some downsides to consider when it comes to fixing roof leaks:
- Complexity of Repairs: Fixing a leak under solar panels can be more complicated than a standard roof repair. The presence of solar equipment adds layers of complexity, requiring careful handling to avoid damaging the panels or electrical components.
- Cost of Professional Help: If you are not comfortable doing the repairs yourself, hiring a professional can be expensive. Costs for roof repairs can range from $300 to $1,500, depending on the extent of the damage and the complexity of the work.
- Potential for Additional Damage: If leaks are not addressed promptly, water damage can lead to mold growth, structural issues, and damage to the solar panels themselves, resulting in higher repair costs.
Myths and Misconceptions
Several myths and misconceptions can mislead homeowners regarding roof leaks and solar panels:
Myth 1: Solar Panels Always Cause Roof Leaks
Many believe that installing solar panels will inevitably lead to roof leaks. While improper installation can contribute to leaks, well-installed solar panels do not inherently cause roof damage. According to a study by the National Renewable Energy Laboratory, properly installed solar systems have minimal impact on roof integrity.
Myth 2: All Roofs Can Support Solar Panels
Another common misconception is that any roof can support solar panels. In reality, not all roofs are suitable for solar installations. Factors such as roof age, material, and structural integrity must be evaluated. A 2021 report from the Solar Energy Industries Association indicated that approximately 30% of roofs are not ideal for solar panel installation due to these factors.
Myth 3: DIY Repairs Are Always Safe and Effective
Many homeowners believe they can handle all repairs themselves, but this can lead to mistakes. DIY repairs may save money initially but can result in more significant issues if not done correctly. A case study from a homeowner in California revealed that an improper DIY fix led to a $2,000 repair bill when water damage spread to the home’s interior.
Statistics and Case Studies
Understanding the risks and realities of fixing roof leaks under solar panels can help homeowners make informed decisions:
- A survey by the American Society of Home Inspectors found that 60% of homeowners reported issues with roof leaks after solar panel installation, primarily due to poor installation practices.
- A case study involving a homeowner in Florida showed that timely repairs of a roof leak under solar panels saved them approximately $5,000 in potential water damage and mold remediation costs.
Frequently Asked Questions (FAQ)
Question 1: How can I tell if my roof is leaking under the solar panels?
Look for water stains or discoloration on ceilings and walls below the solar panels. Additionally, inspect the roof for visible damage or gaps around the mounting brackets.
Question 2: Can I fix a roof leak under solar panels myself?
While some homeowners may be able to handle minor repairs, it’s often best to consult a professional, especially if you are uncomfortable working at heights or dealing with electrical components.
Question 3: How much does it cost to fix a roof leak under solar panels?
The cost can vary widely based on the extent of the damage and whether you hire a professional. Repairs can range from $300 to $1,500 or more, depending on the situation.
Question 4: Will fixing a roof leak affect my solar panel warranty?
Most solar panel warranties remain intact as long as repairs are done correctly and do not damage the panels. However, it’s essential to check the warranty terms and consult with the manufacturer if unsure.
Question 5: How can I prevent roof leaks after installing solar panels?
Regular inspections, proper installation by qualified professionals, and timely maintenance of both the roof and solar panels can help prevent leaks.